Getting Started
Installation
- Upload the plugin folder to
/wp-content/plugins/or install via Plugins -> Add New in your WordPress admin. - Activate the plugin via the Plugins menu.
On first activation, a PlugUpp registration dialog appears.
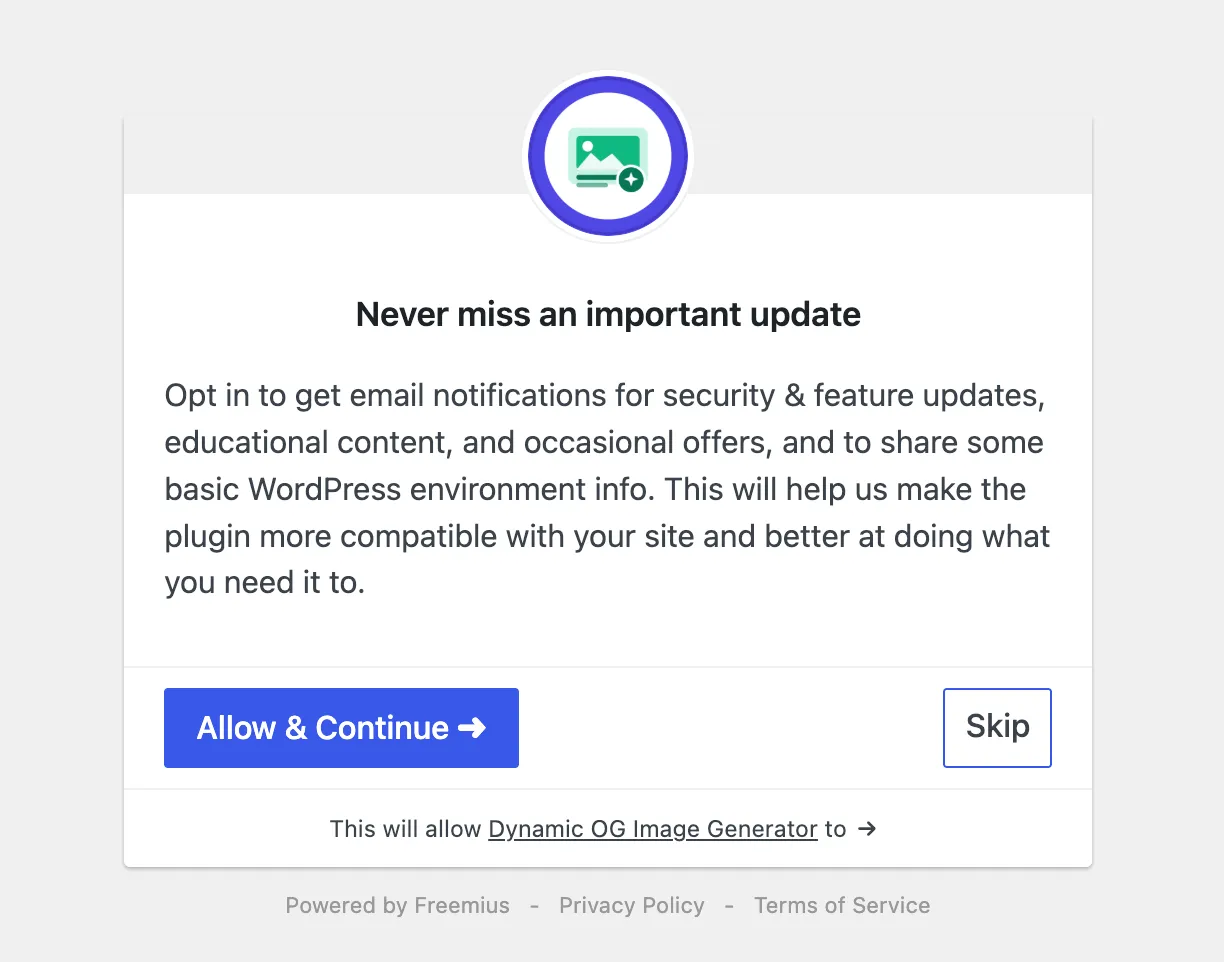
Click Allow & Continue. You will receive a confirmation email - click the link in that email to complete registration. The plugin will not generate screenshots until registration is confirmed.
If you clicked Skip on the dialog, you can complete registration at any time from the Dashboard or Settings sub-page. A banner at the top of the OG Images screens will prompt you to finish - the plugin will not generate screenshots until you do.
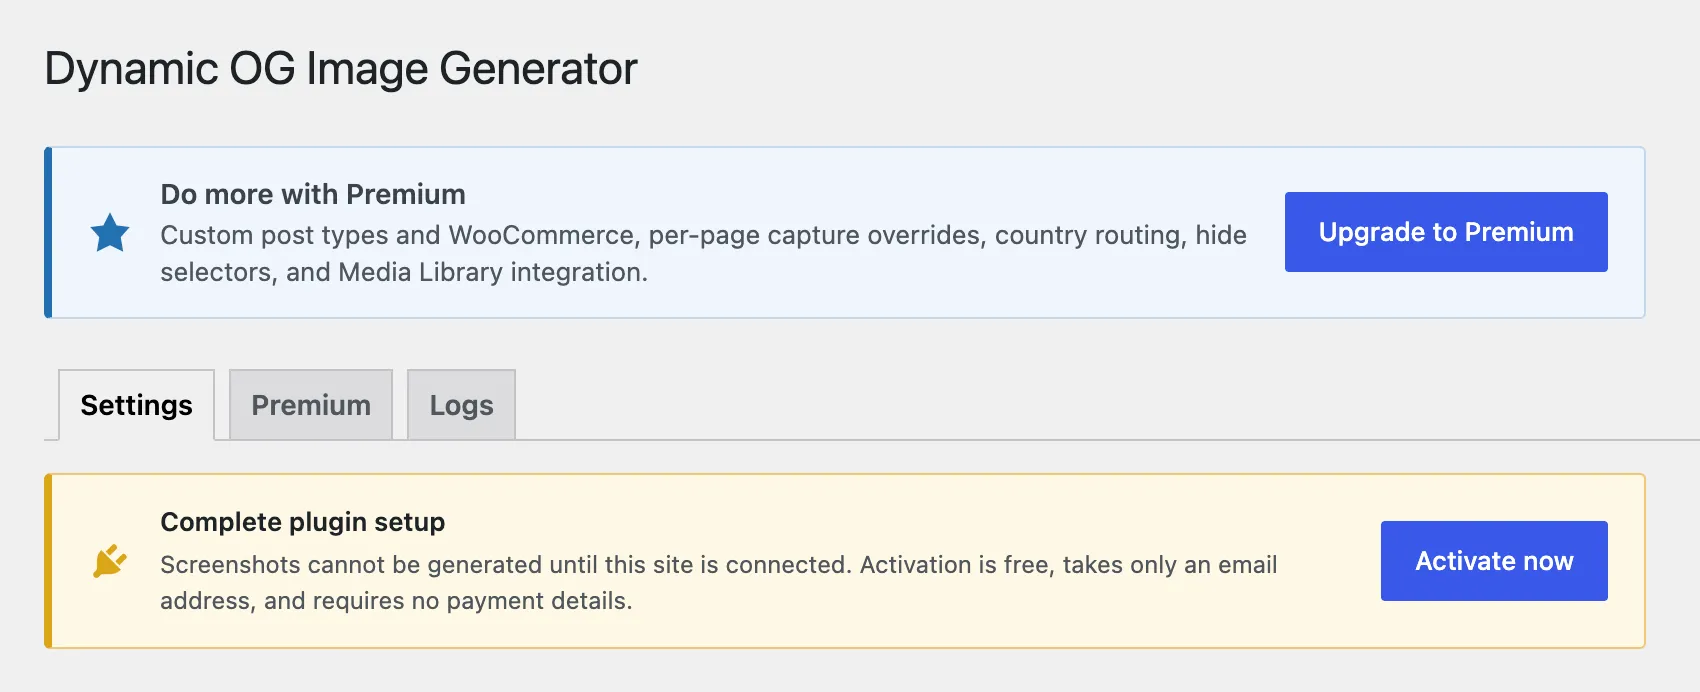
Once registration is confirmed, go to OG Images > Settings and pick an Image Source for Posts and Pages.
Pick an Image Source
A fresh install starts with the Image Source set to Off for Posts and Pages, so the plugin does not begin consuming your screenshot quota before you have consciously opted in.
The Image Source dropdown sits at the top of the OG Images > Settings page, with one entry per content type. The five options are:
- Auto-screenshot - the plugin captures a real browser screenshot of each page and uses it as the og:image. This is the original DOIG behaviour.
- Featured image - emit the post's Featured Image as the og:image. Emits nothing when no Featured Image is set. Does not consume your screenshot quota.
- Featured image (with screenshot when missing) - emit the post's Featured Image when one is set, fall back to an auto-screenshot when no Featured Image exists. Screenshots are captured only for posts without a Featured Image.
- Custom image - emit a single Custom image from your Media Library. Pick the image per post from the block editor sidebar. Does not consume your screenshot quota.
- Off - DOIG steps out of the og:image chain for this content type. Your SEO plugin's default takes over.
Individual posts can override the content-type default from the block editor sidebar - see Per-post controls.
Your first screenshot
After saving an Auto-screenshot or Featured-image-with-fallback default, open any published page or post in the block editor. You will see an OG Image panel in the right sidebar. The status will show as Pending while the screenshot is being generated.
On an active site, the screenshot typically appears within a few minutes. You can also click Regenerate Now in the sidebar to trigger an immediate attempt.
Once the screenshot is ready, the status changes to Ready and a thumbnail preview is shown with the capture date.
Verifying OG image in your page source
To confirm the plugin is working, view the source of a published page and search for og:image. For an Auto-screenshot source, you should see a URL pointing to your site's uploads folder (/wp-content/uploads/dynamic-og-images/). For a Featured-image or Custom-image source, you should see a URL pointing to the chosen attachment.
You can also use the Facebook Sharing Debugger to preview how your page will appear when shared. X (formerly Twitter) no longer offers a dedicated card validator; X will preview the card automatically when you draft a post linking to your page.
Next steps
- Screenshot settings - configure Image Source per content type, viewport, capture delay, and blocking options
- Per-post controls - override the Image Source for individual pages, and (Premium) per-page capture overrides
- Cache management - refresh, clear, and manage your screenshot cache, including the cache-flip orphan sweep
- SEO plugin compatibility - how the plugin works alongside Yoast, Rank Math, and AIOSEO