Getting started
1. Install and activate
Install Search & Social Appearance Audit from the WordPress.org plugin directory (Plugins > Add New), or upload the ZIP under Plugins > Add New > Upload, then activate it. A new Appearance Audit menu appears in the WordPress admin sidebar, beneath Appearance.
2. Run your first scan
Click Scan now. The plugin renders each of your pages the way a visitor's browser would, reads the metadata that actually ships, and records the results. You can leave the page - the scan continues in the background.
The free plugin audits all of your pages and posts. Paid plans add custom post types and WooCommerce products, scheduled scans, and more.
3. Review the results
Results are shown on three tabs:
- Search Appearance - each page as a Google-style mobile result (breadcrumb, title, description and an indicative thumbnail), with the Issues badge alongside and any Warning, Notice and Robots flags on the card.
- Social Appearance - each page as a social share-card preview (image, title, description) plus the X (Twitter) card type.
- Findings - every page with something flagged, with its area, a one-line summary, and separate Issues, Warnings and Notices counts so you can triage without opening each one.
Hover any preview for the full text. Click a preview image to open it full size with the area each platform keeps highlighted and the cropped edges dimmed. Click any badge - or any row on the Findings tab - to open the details popup, which shows each problem with the exact evidence from the rendered page and quick actions (view, edit, re-scan, and ignore).
See Reviewing your results for the full tour of the previews, the crop overlay, the issue-details popup and everything the audit flags.
4. Fine-tune what gets audited
- Exclude pages you do not need to audit - from the row actions, the Excluded view, or in bulk from the standard Posts and Pages screens.
- Ignore an individual issue (on one page or sitewide) from the issue details popup; it stays visible but stops counting.
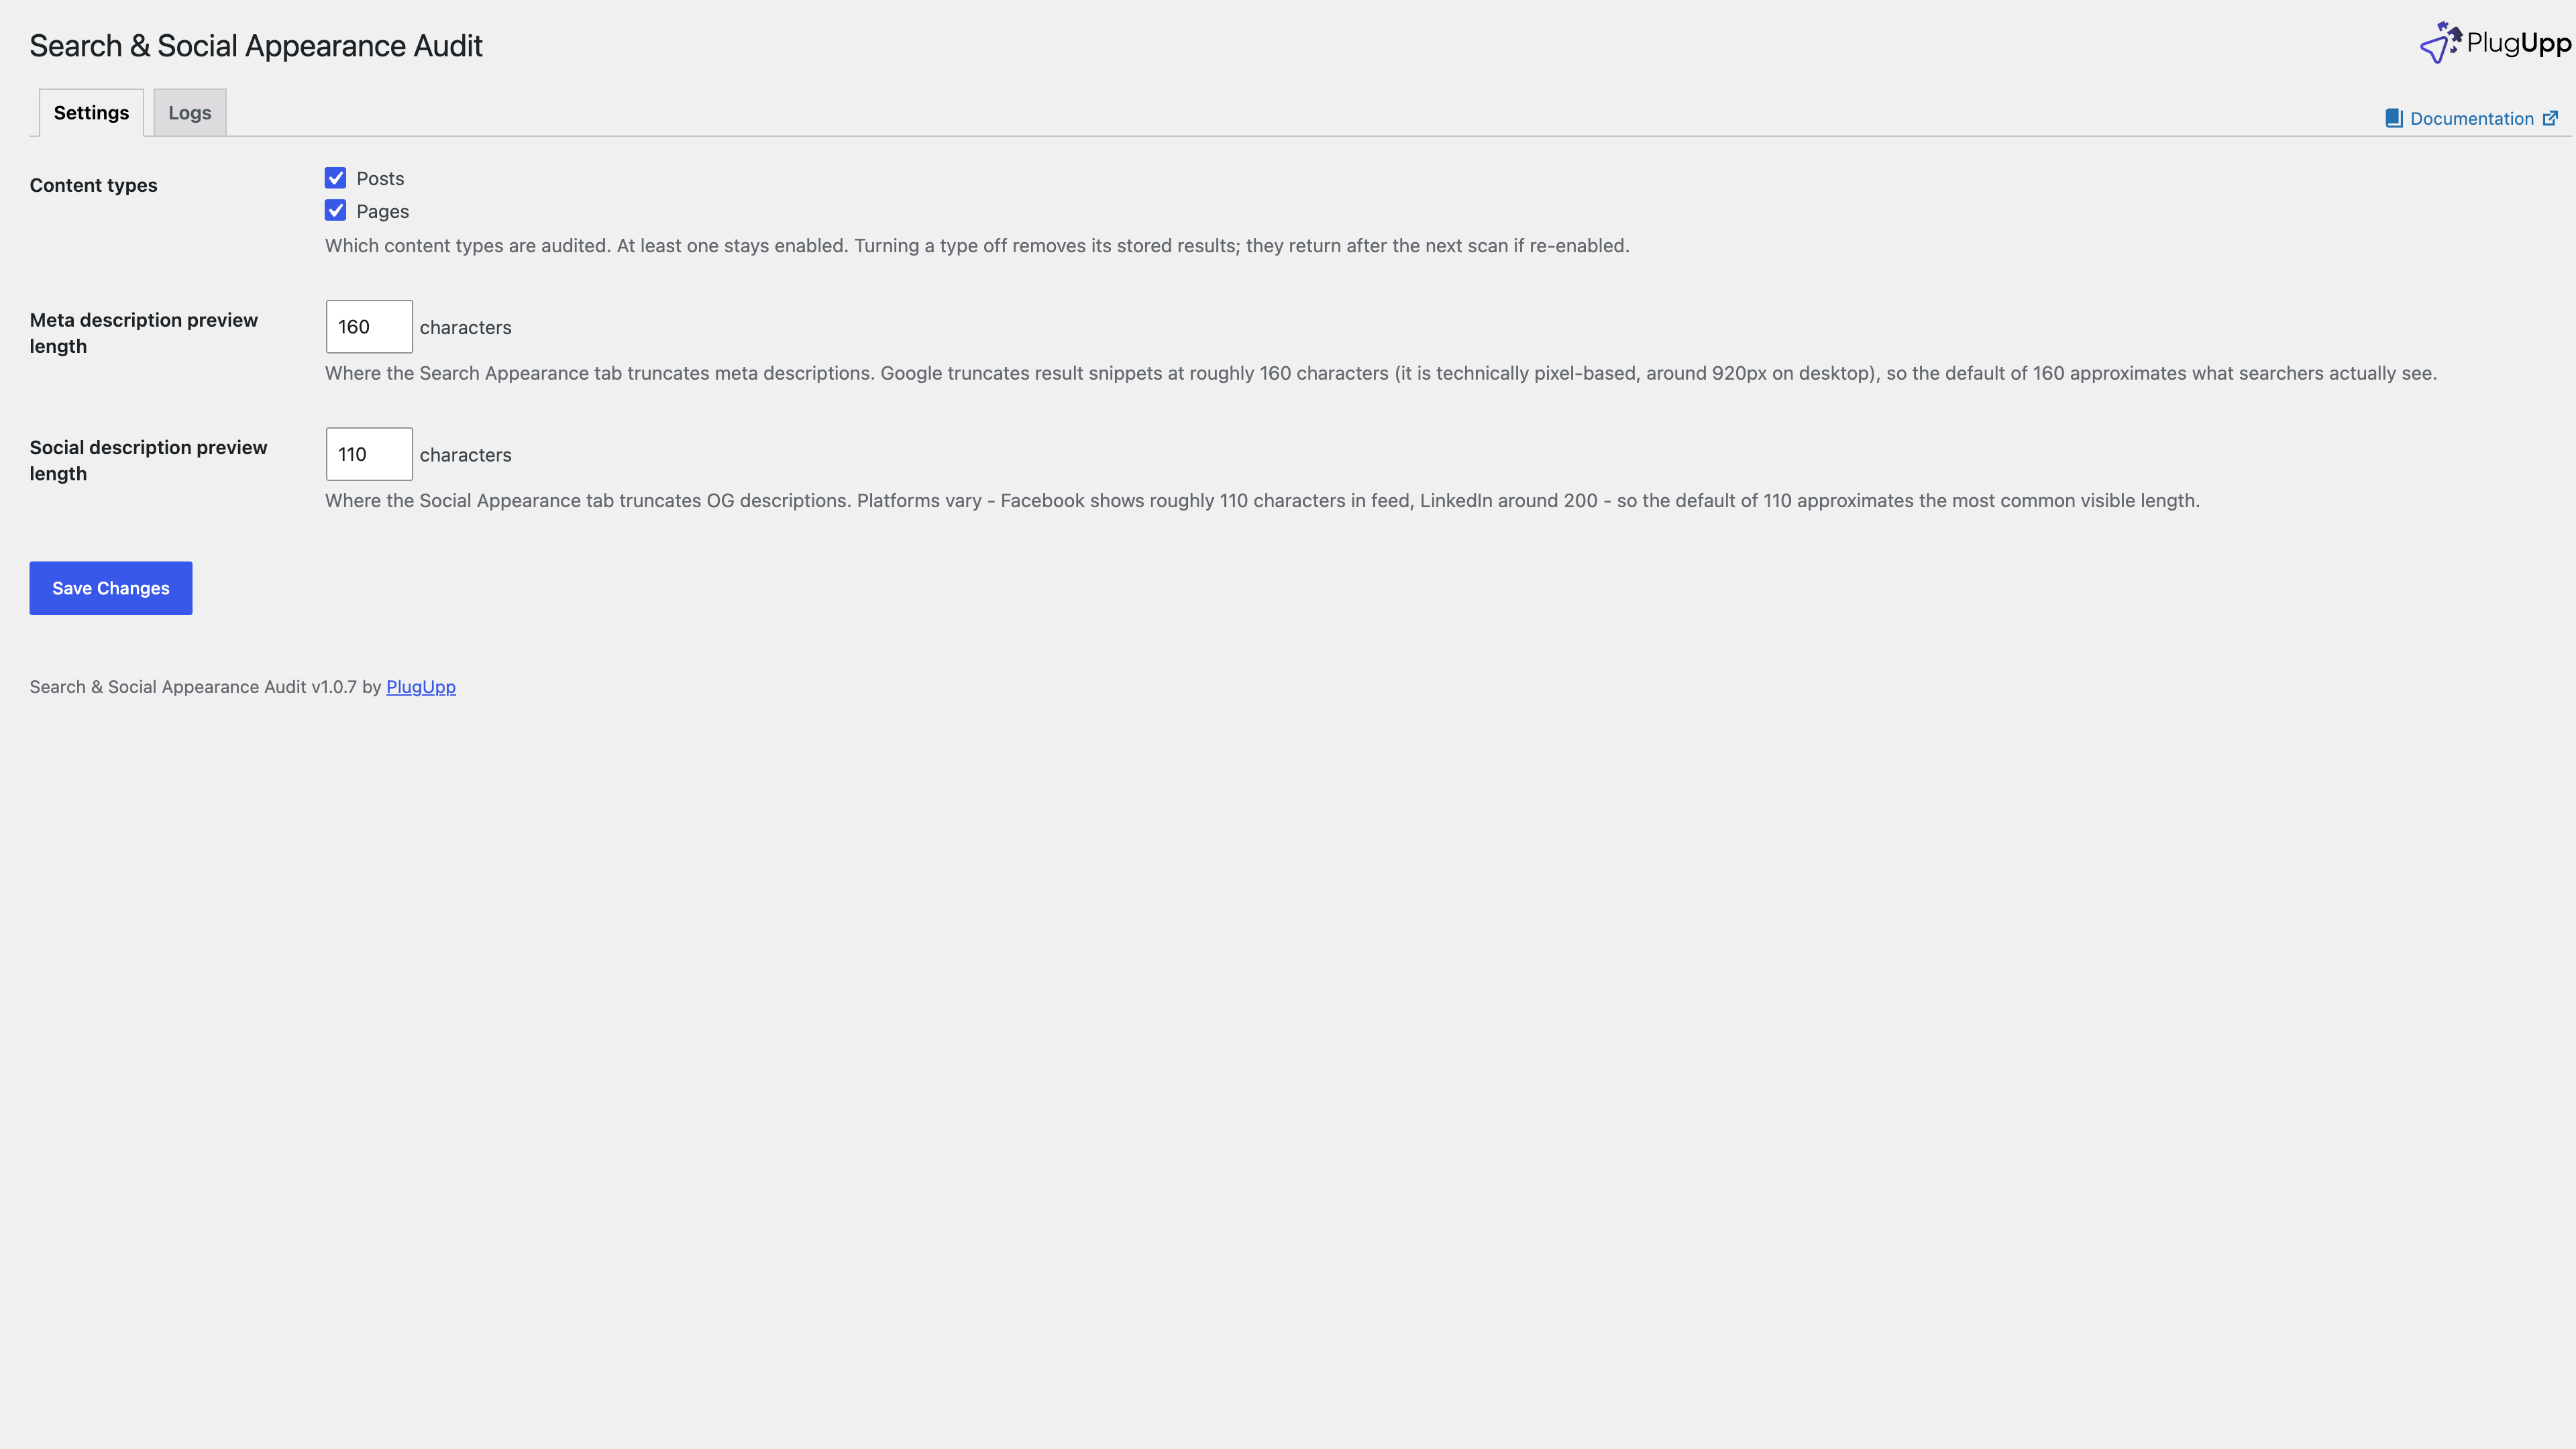
- Settings lets you set the description preview lengths, choose which content types are audited (paid), configure scheduled scans and email reports (paid), and view the log.
Private and password-protected content is skipped automatically - it can never appear in search or social, so there is nothing to audit.