Getting started
Ten minutes from install to a notification that carries files.
1. Install and activate
- Install and activate Gravity Forms 2.5 or later. Without it the plugin shows a notice and does nothing else. To attach the files from the page a form was on, you need Gravity Forms 2.9 or later.
- Install and activate PlugUpp Dynamic Attachments for Gravity Forms.
Nothing else is required.
2. Choose where the Email attachments box shows
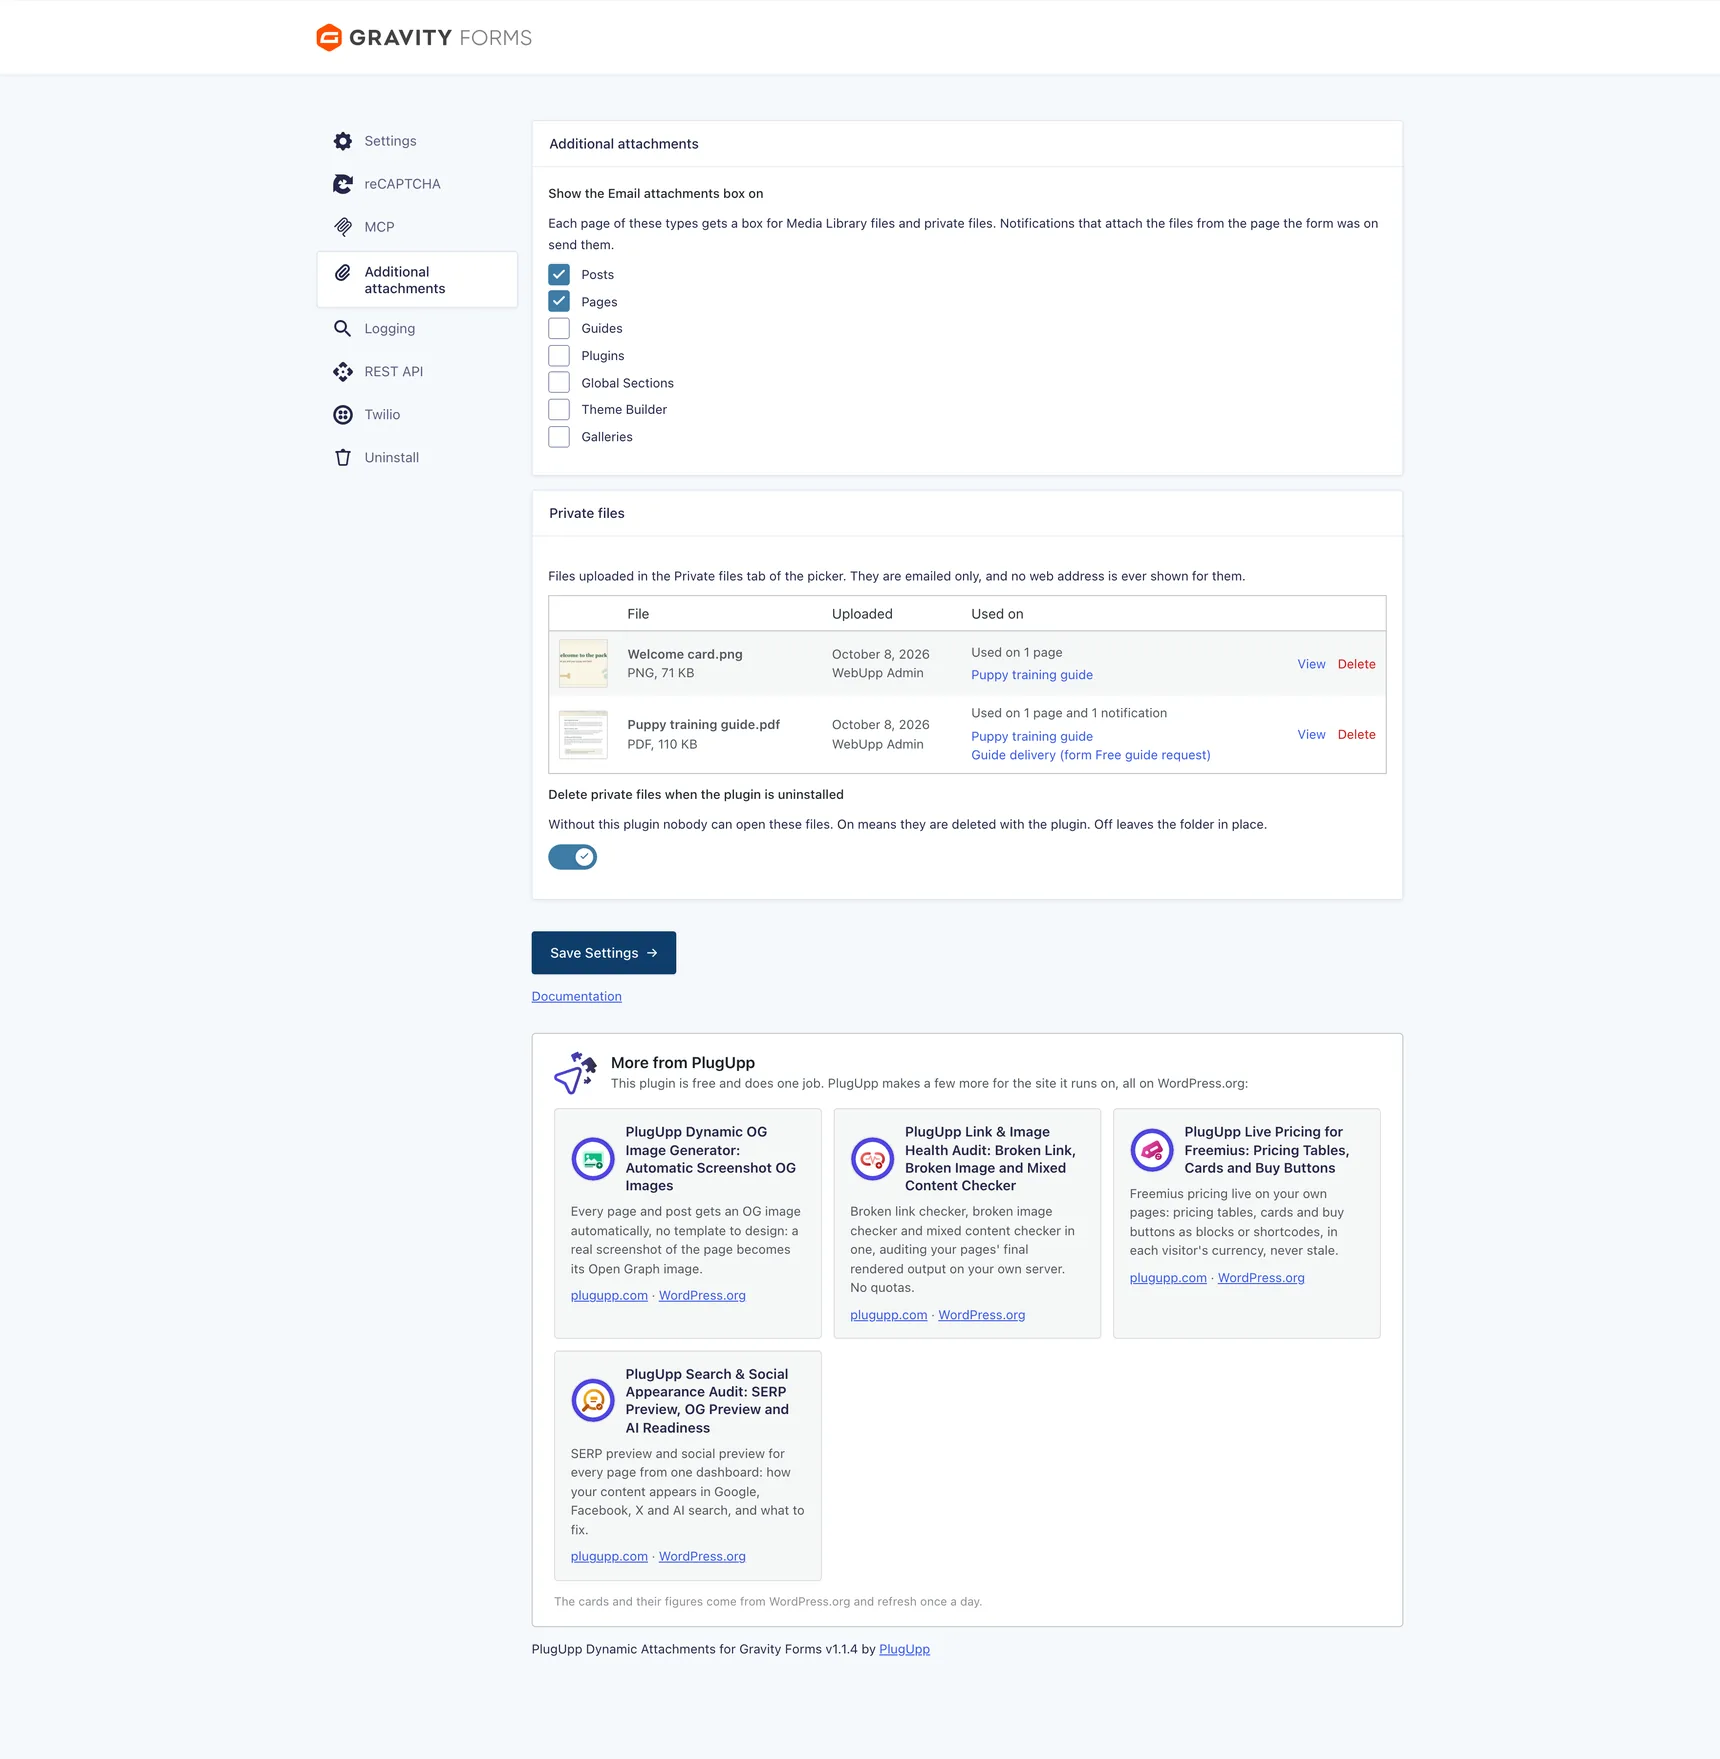
Go to Forms, Settings, Additional attachments. Show the Email attachments box on lists your public post types, with Posts and Pages ticked. Change the ticks if your files live on other types, then press Save Settings. The same tab lists your private files once you have some, and links back to these docs.
Skip this step if you only want static files.
3. Pick the files on a page
Edit a page of a ticked type. Find the Email attachments panel in the block editor's sidebar, or the box in the classic editor's right-hand column. Press Add files, pick one or more files, press Add to page, and update the page.
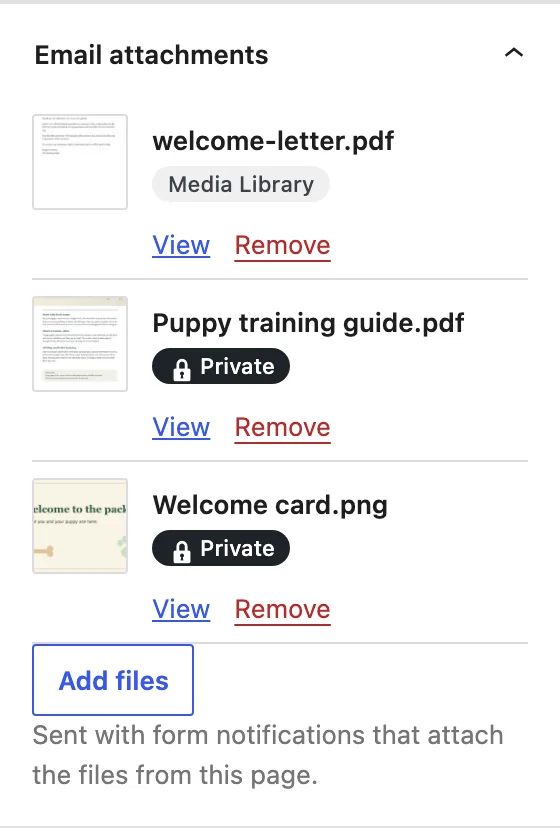
The window has three tabs. Upload files and Media Library are WordPress's own. Private files holds files that are emailed only, and no web address is ever shown for them. Upload a file there to keep it out of the Media Library. See Private files.
4. Put the form on that page
Add the form to the page. Gravity Forms records the page on each entry when the form is sent, and that is how the plugin knows which files to send. See Dynamic attachments.
5. Set up the notification
Open the form, then Settings, then Notifications, and edit the notification that should carry files. Scroll to the end. The Additional attachments section sits below Gravity Forms' own settings, and those settings are not changed.
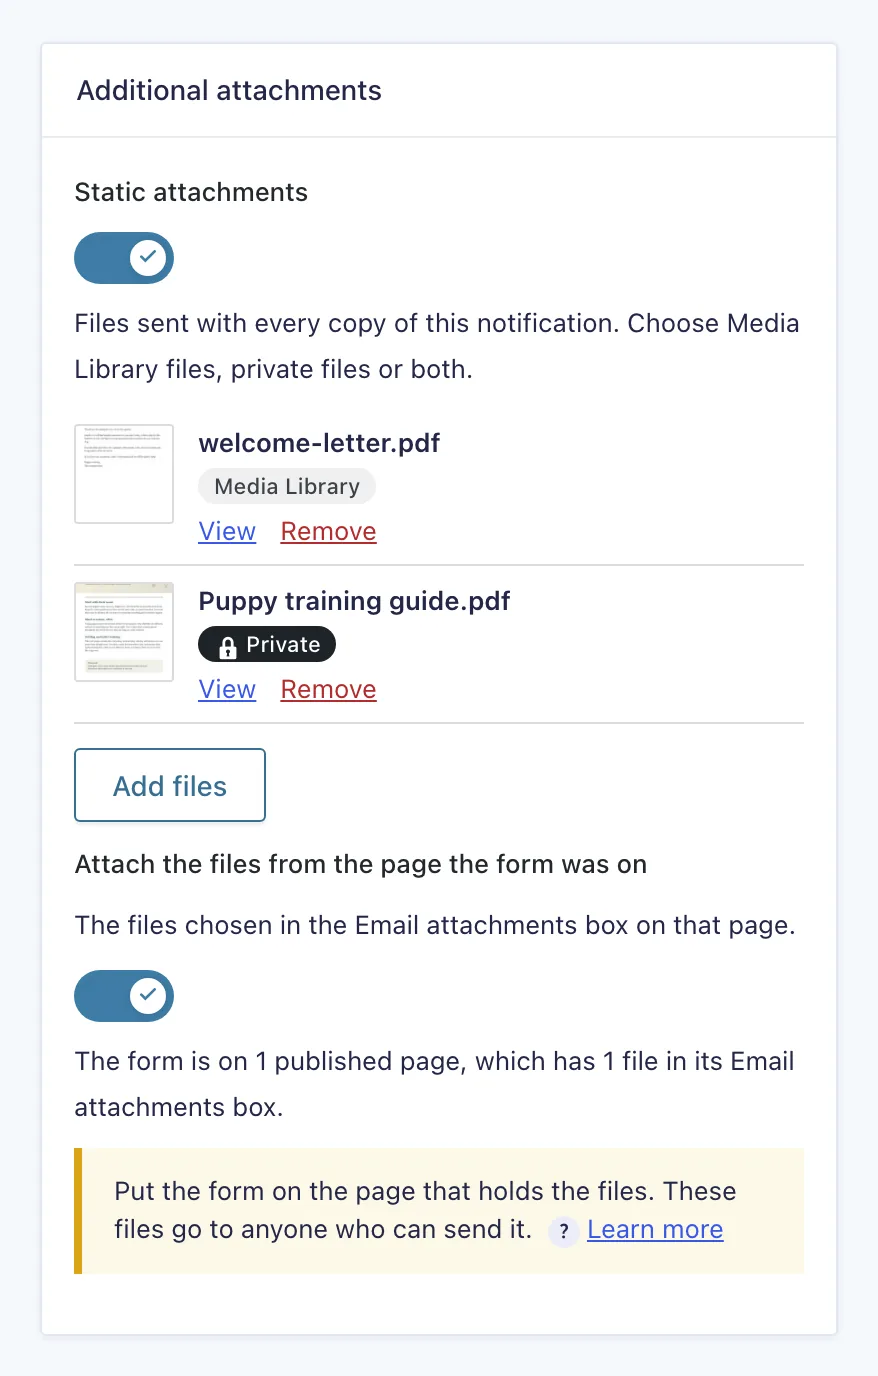
- For files that go with every send, turn on Static attachments. Press Add files, pick them, and press Add to notification. See Static attachments.
- For each page's own files, turn on Attach the files from the page the form was on. A line appears under it saying how many published pages hold this form and whether their Email attachments boxes have files, for example "The form is on 1 published page, which has 2 files in its Email attachments box." If it says no page has files yet, go back to step 3 or 4.
You can use both together. A file that both pick is attached once. With both switches off, the plugin leaves the notification alone.
6. Save and read the help line
Press Update Notification. If Static attachments is on with no files chosen, the section says so and nothing is saved. One line at the end of the section says where the form goes and who gets the files. Point at the ? beside it, or move to it with the keyboard, for the details. Please read them once. Learn more opens this guide.
7. Test it
Send yourself a test submission from the page. To see what the plugin did, turn on logging for PlugUpp Dynamic Attachments for Gravity Forms under Forms, Settings, Logging. A successful send writes "attachment prepared" with the attachment IDs and file names. A held-back send also leaves a note on the entry. See Failure diagnostics.
Uninstalling or deactivating
While the plugin is inactive it cannot hold a notification back. Gravity Forms then sends it without these files. Turn the affected notifications off, or change them, before you deactivate or delete the plugin. The plugin's panel on Forms, Settings, Uninstall says the same. Deleting the plugin removes its tab setting and, unless you turned off Delete private files when the plugin is uninstalled, its private files. It leaves the settings on each notification and the files chosen on each page, where they do nothing until it is installed again.