Getting started
Five minutes, most of it in the Freemius dashboard.
1. Install and find the menu
Activate the plugin. Freemius Pricing appears in the WordPress admin menu, with three screens under it:
- Products - one row per Freemius product, and where you add one
- Settings - the site-wide choices: default currency, checkout, refresh interval
- Logs - what the plugin has been doing, and the log level
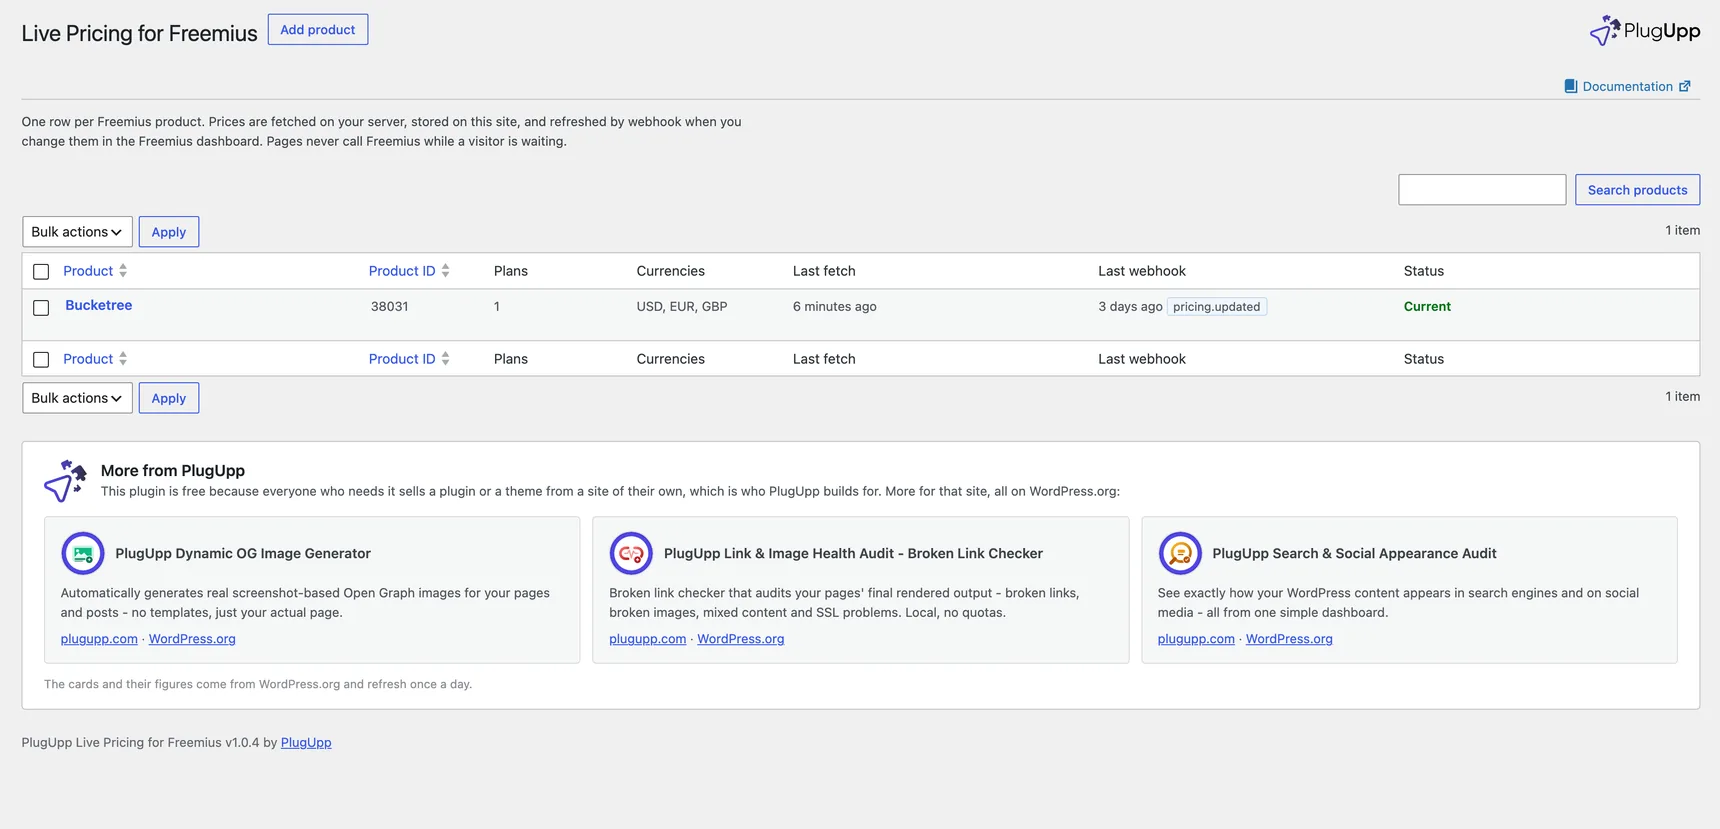
It opens on Products, which is empty to start with. Once a product is added, the row shows what the plugin knows about it:
2. Get the product id and the API Bearer Authorization Token
In the Freemius dashboard:
- Open the product you want to show prices for.
- The numeric product id is in the URL and at the top of the product's own pages. Copy it.
- Go to Settings, then Keys.
- Copy the product's API Bearer Authorization Token.
The token this plugin needs is read-only in practice: it can read the product's plans and prices and it cannot change them. Nothing about your visitors is ever sent to Freemius by your server.
3. Add the product
Back in WordPress, on Freemius Pricing, Products, press Add product:
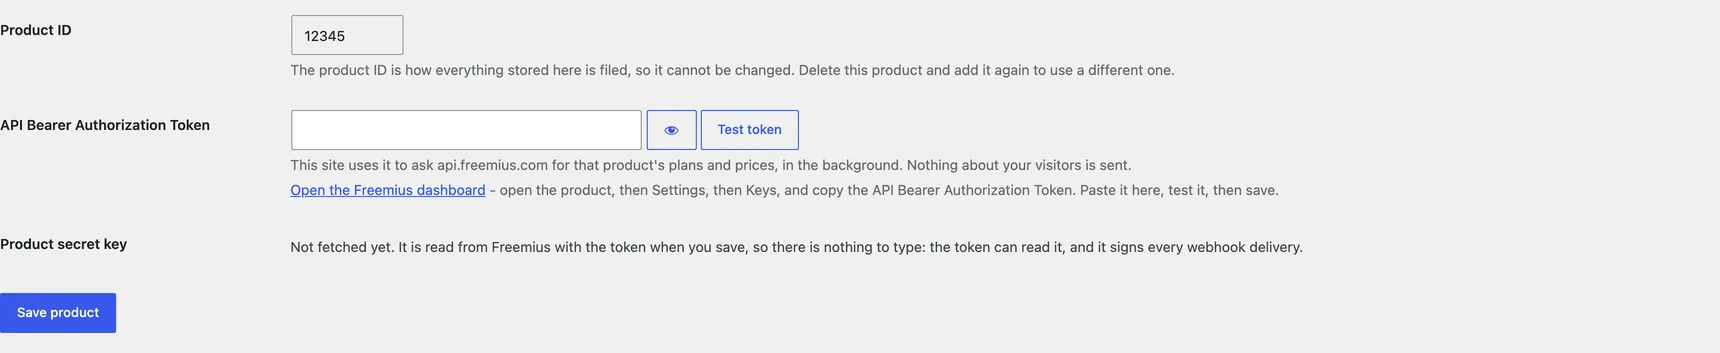
- Product ID - the number you copied. It has to be one this site does not already use, and it cannot be changed afterwards, because it is how everything stored for the product is filed. There is no name to type: the product's name and slug arrive from Freemius with the first fetch, and a shortcode can use either instead of the id.
- API Bearer Authorization Token - paste it in. The field is masked; the eye button beside it shows the value if you need to check a paste.
- Press Test token. It reports the product's name, the plan names and how many pricing rows came back, or exactly what Freemius said if the token was refused.
- Press Add product. The save fetches the prices and the product's name, reads the product secret key with the token (it is what proves a webhook really came from Freemius; there is nothing to type), and registers the webhook.
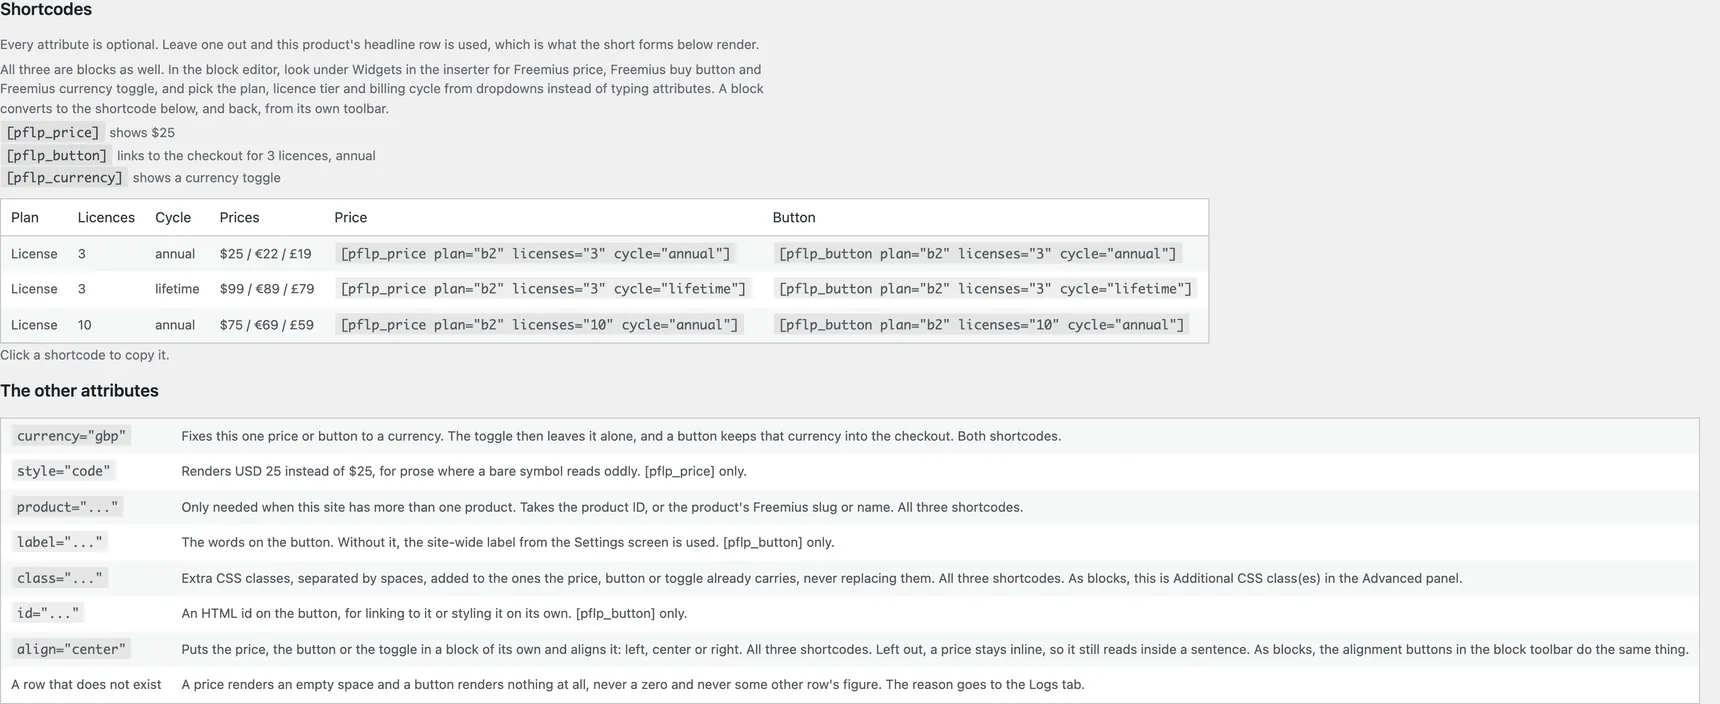
Saving fetches the prices straight away, every time, and the product's name comes with them. You land on the product's own screen, which now has a Shortcodes section: the shortest working form of each shortcode with what it renders for your product, then a table with a ready-made price shortcode and button shortcode on every row. You can come back to it at any time from the Products list, by clicking its name or its Edit link.
4. Check the webhook
Nothing to do: saving the product with a working token registered this site's webhook with Freemius, and every later save checks it is still there and subscribed to the right events. The Status list on the product's screen reads Webhook: registered with Freemius, and the same webhook is listed in the Freemius dashboard under the product, then Webhooks, then Listeners.
If that line reads not enabled by Freemius for this product, Freemius has not unlocked webhooks for the product yet: it reserves them for products that are actively selling, and the dashboard cannot add one either. The save is complete, the prices are live and refresh on the interval, the token is fine, and every later save tries again, so the webhook appears by itself once Freemius allows it. There is nothing to do.
If it reads not registered, the call failed (Freemius unreachable at the time, most likely); it says why, a later save tries again, and Show webhook URL beneath it opens the URL, a Copy button and the six events to do it by hand in the meantime.
https://example.com/wp-json/pflp/v1/webhook/12345/aB3dEf...
In the Freemius dashboard:
- Open the product, then Webhooks, then Listeners.
- Press Add Webhook and paste the URL in.
- Subscribe it to these six events:
pricing.createdpricing.updatedpricing.deletedplan.createdplan.updatedplan.deleted
- Save.
Treat the URL like a password. It contains a key your site generated, and it is what tells your site the request is genuine, together with the signature Freemius sends on every delivery.
You do not have to do this step. Without a webhook, prices refresh on a timer instead, and a change can take up to the time set in Refresh after to appear.
5. Put prices into your pages
In the block editor
Open the inserter, look under Widgets, and pick Freemius price, Freemius buy button or Freemius currency toggle. Each one renders your headline row the moment it is inserted; the sidebar has dropdowns for the plan, the licence tier, the billing cycle and the currency, offering only the combinations your product sells. See Blocks.
Anywhere else
The three shortcodes do the same thing, and are what a page builder, the classic editor, a widget area or a template file wants.
Every attribute is optional, so the shortest form already works. For your headline price and a button that buys it:
[pflp_price]
[pflp_button]
Copy a shortcode out of the table on the product's screen for any other row. In a pricing tile:
[pflp_price plan="b2" licenses="3" cycle="annual"]
In a sentence:
Thirty days free, then [pflp_price plan="b2" licenses="3" cycle="annual"] a year.
And where visitors should be able to choose a currency, usually once near the top of your pricing section:
[pflp_currency]
See Shortcodes for every attribute and what each default resolves to. A Shortcode block holding any of the three converts to the matching block in one click.
6. Set the site-wide options
Freemius Pricing, Settings holds the choices that are not per product. Under
Display: the default currency written into the page, whether a visitor's
currency choice is remembered in their browser, whether a buy button opens the
hosted checkout or an overlay, and how stale the stored prices may get before a
page view schedules a background refresh. Under Buttons: the words on every
[pflp_button] and every buy button block that does not carry a label of its
own, any extra CSS classes every button should get, and the Hover effect:
none, or a 1px lift with a soft shadow on screens wide enough to have a
pointer.
7. Check it
Open the page as a logged-out visitor. You should see the current prices. Change a price in the Freemius dashboard, reload within half a minute, and you should see the new one, with no visit to the editor.